The Spiceman Cometh

A few weeks ago I mentioned a truly squeal-y moment. Well I can now reveal the details. My apologies to Wlx who did an awesome job of the card below. It’s been stuck on my fridge for me to admire and got a bit worn in the process.

???????????????????????????????

Probably the best leaving present that I have ever had – a one to one session with one of The Spicemen…. Mr T Singh himself.

There were quite a few mails back and forth trying to agree on what to cook and when.

When: I so wanted to wait until we had a new kitchen. But that would have been too far into the future (end April). Then I read that he isn’t allowed into his wife’s kitchen as he’s too messy so my mind was made up to get him in sooner. We were hoping he would come on a Friday afternoon when kiddo was at home. We agreed on a Friday but it had to be the morning (later found out he was off to take part in Saturday Kitchen’s 400th episode so he’s allowed to set terms!)

Cuisine: Tony has over 20 years experience as a chef doing all sorts of cuisines and though I would have absolutely loved a session in either chocolate work or pastry making, in the end I decided (lying here….hubby told me!) that it had to be Scottish Punjabi food. Before agreeing on the menu, I searched through the SpiceMen cookbook and also downloaded his latest book Tasty on the kindle to get some idea of what types of dishes interested me. Just a side note, never get a cookbook on Kindle, it’s just not the same as thumbing through a physical one and propping it up in the kitchen when cooking.

The final agreed menu:

Falafels

and Satan’s Ketchup

Stuffed Pratha

Wild Mushroom
Samosa`s

Dhal

( Curried yellow lentils)

Herbed Rice

Mint and Coriander Sauce

I had two weeks between leaving the job and my next one. The session took place on the last Friday. During those weeks, I spent a LOT of time tidying. Lots of moving stuff about. Doing my shoulder in moving shelf units about and realising that I have a lot of cookbooks. Partly to get ready for the kitchen refit, and partly because I didn’t want any spec of dust to be visible. Two weeks later the bloody laundry baskets were still not empty – rather like Terry Prachett’s The Luggage they just keep spewing out laundry. So they were chucked out of view.

A few days beforehand I took out my food processor – it’s part of a huge kitchen aid that Mr Plummy bought for my birthday last year. I only ever use the cake making part and didn’t even know there was a food processor bit until I was in the midst of the mad clearout. Whooo hoo. That was washed, instructions read and I was set!

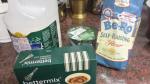
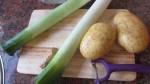
The day before I went shopping for the ingredients list Mr Singh had sent me. Strangely there were not many spices but lots and lots of herbs. Four supermarkets later I was devastated that there were no wild mushrooms available anywhere in Livingston. But a quick email and he confirmed a substitute was fine.  I also bought a new chef’s knife and whilst practicing at home managed to slice off of a bit of my finger nail, painfully. So that was hidden away on a high shelf away for kiddo’s little fingers. I got Mr Plummy to sharpen up a selection of the knives that I use more regularly.

Friday 20th March was the day of the solar eclipse. Diverted my attention for all of an hour (clouds got in the way of my pinhole camera working hey ho). Then, I got ready by getting out equipment and ingredients. Note the total lack of space now! Limes… I’ve never used limes in Indian cooking so this was going to be interesting. As were the herbs (am getting obsessive innit)

IMG_2033

Then bang on time (which is very un-desi like), a Range Rover drove up and I had an uncontrollable fit of giggles. He was here, red turban, red shoes and ladybird earrings. I opened the door, then closed it in his face saying I had to get rid of the giggles. He came in with a crate.

In the kitchen he asked for a surface so I had to creep into the laundry filled conservatory and drag out a table. And what came out of the crate was this. SPICES. No wonder he didn’t list any in the shopping. He had them all. I was just sticking my nose in everything.

20150320_130718

Now some of these I have already. But it’s the ones that I don’t that I want! Garam masala is a prime example – Gujaratis don’t tend to use it much. His was delicious as it contained star anise giving it a slightly liquorice scent. And there was the curious pink pot which I later learnt contained asafoetida crystals –  I had no idea that asafoetida was resin extracted from a number of plants. The powder I have in my kitchen is the crushed up form of the crystals.

See the roll of knives. Yes, chefy types really do sharpen their knives –

IMG_2034

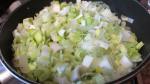
I had pen and paper ready to take notes but was told not to worry about recipes as he had copies for me. I should have read them before we started so I would have an idea of what we were going to make. But I just too excited and had so many questions to ask so we just got stuck into the prep. I wish I had taken notes but the next 3 hours were spent talking a lot. It was a golden opportunity chance to ask about working in the restaurant business, to find out what it was like to get work after he finished his catering studies (shortsighted restaurant people saw the turban and turned him away, the fools!), why so many Indian restaurants close in Edinburgh, about charities in Edinburgh and lots of questions about a Punjabi boy growing up in Scotland. We talked about family, about Punjab Junction (in Leith and run by his aunt, where his mum can be found) the recipes his female relatives won’t teach him as he’s a man! Lots of chatter about the healthy eating courses I teach and the cooking he does with communities/charities.  Some chat on diabetes (its high in Asian populations) and also the new rules on allergen labelling in restaurants. And all the while a lot of washing, peeling and chopping.

We chopped (OK mostly he did the work as I was too busy chatting) as the first lesson was about prepping ingredients all beforehand. There was a lot and in reality, probably too much for my little family. But he gave me tips on how to cover the garlic, ginger and chillies in freezer boxes then cover with oil. The oil preserves the ingredients, and as an added bonus infuses so you can use the oil itself in cooking for flavour.

Or to freeze them in ice cubes. I’ve frozen garlic/ginger before but never chopped chillies. It’s all about having things ready so that when you cook, you can just chuck things into the pot.

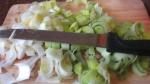
So here’s what was chopped:

A bag of white onions. At this point, I got a lesson in how to chop properly. First I had to use the correct knife. Out came the finger tip chopper. Then I was shown how to hold my left hand which holds the item to be chopped (think about how club scout salute!) but my hand didn’t like that so I was told to keep my thumb and pinky out of the way and then look at the shape of the blade which is designed to chop in a rocking motion. The tip should always remain on the board and I should use the heel of the blade to cut, not the top end near the blade as I’ve always done. I then got on with cutting the onions. And slicing off a tiny bit of my thumb. What a dummy! Blood started to seep out. Here’s the next tip – have the spray on plaster stuff in your cookbag or even superglue 3. I suspected he was taking the mick but he insisted that  it was used by the Americans in Vietnam to bind wounds temporarily whilst soldiers were taken to hospital. (Turns out there is some truth in this according to Wikipedia…!!!)

3 red onions – sliced ready for pickled onions.

Garlic: About 7 bulbs of which each individual clove was peeled by him

Ginger – I was doing my usual of scraping the skin when he told me to slice it off and freeze it to use in smoothies, or in ginger/lemon tea.  I’m looking forward to using that.

IMG_2035

Chillies – 150 grams worth!!!!! That’s a lot of chillies.  I was instructed to wash these and pull the stalks off.

To avoid washing the processor he advised that I should whiz up the ginger first, scrape it out then put that in to a freezer box, next do the garlic (scrap and store) and finally the chillies.

Herbs – coriander, parsley and mint. These were washed and I spun them in my salad spinner to drain off the water. He pulled the leaves of the mint off. I also had tarragon but this was not washed just taken out of the bags and then I pulled the leaves off.

Mint and coriander sauce:

My wee processor was not up to the task of making the sauce so he dashed to his car and got his supermixer. I would love to have this but I bet it costs a bomb. In went the mint, coriander, some of the whizzed up garlic, ginger and chilies, sugar, salt and vinegar. It was whizzed up to a runny paste and is happily sitting in my fridge now.

IMG_2036

Pickled onions: The sliced red onions were put into a large bowl, then we added the juice of 2 limes, distilled vinegar, chilli flakes, anar dana and salt. Now anar dana is a new ingredient for me – it’s the powder made from dried pomegranate seeds. It’s really tangy but sweet too which surprised me as pomegranates are never sour but are sweet. In the Tasty book, the recipe uses pomegranate molasses but he said the powder is a good substitute. OMG this mix was just delicious – we were all eating it straight out of the bowl. But the recipe says you should mix it, bottle it and wait at least 3 hours. Again in the book, it says wait a week. No way they are going to last a week – I’ve already had them with lunch and again at dinner that night, in sandwiches, as the base of mash and just as a sneaky snack.

20150320_130727

Dhal:

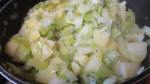
This was very different from the dhals I cook. For one, there was no ginger or garlic in it. Instead, he used asafoetida – which led to a chat about jains and swaminaryan bods who don’t use food taken from the ground (and hence no onions, garlic or ginger). So the dhals were boiled in water – he grabbed a mix fo dhals from my shelves including red lentils, yellow split dhal (which I never used before) and chana dhal (which I use in some curries but never as a dhal). These were boiled in plenty of water. After that he added in salt and tumeric and half a tin of chopped tomatoes. Once the dhal was soft, he added a tarka which was made by melting about 100g unsalted butter (eeek see my cholesterol levels go up) to nutty point then adding cumin seeds, chilli powder and about 2 tablepoons of asafoetida (which for me is a huge amount, I normally just use a small pinch). The recipe he gave me included ginger and garlic paste but I’m pretty sure he didn’t put any in on the day. This is mixed into the soft dhal and he usually finishes it off with more butter. But I had to insist that this was left off. There was no chili in this as I wanted my daughter to try it. It was the only way we could get her to eat it and truth be told – the dhal didn’t need it. It was simply delicious.

20150320_133638

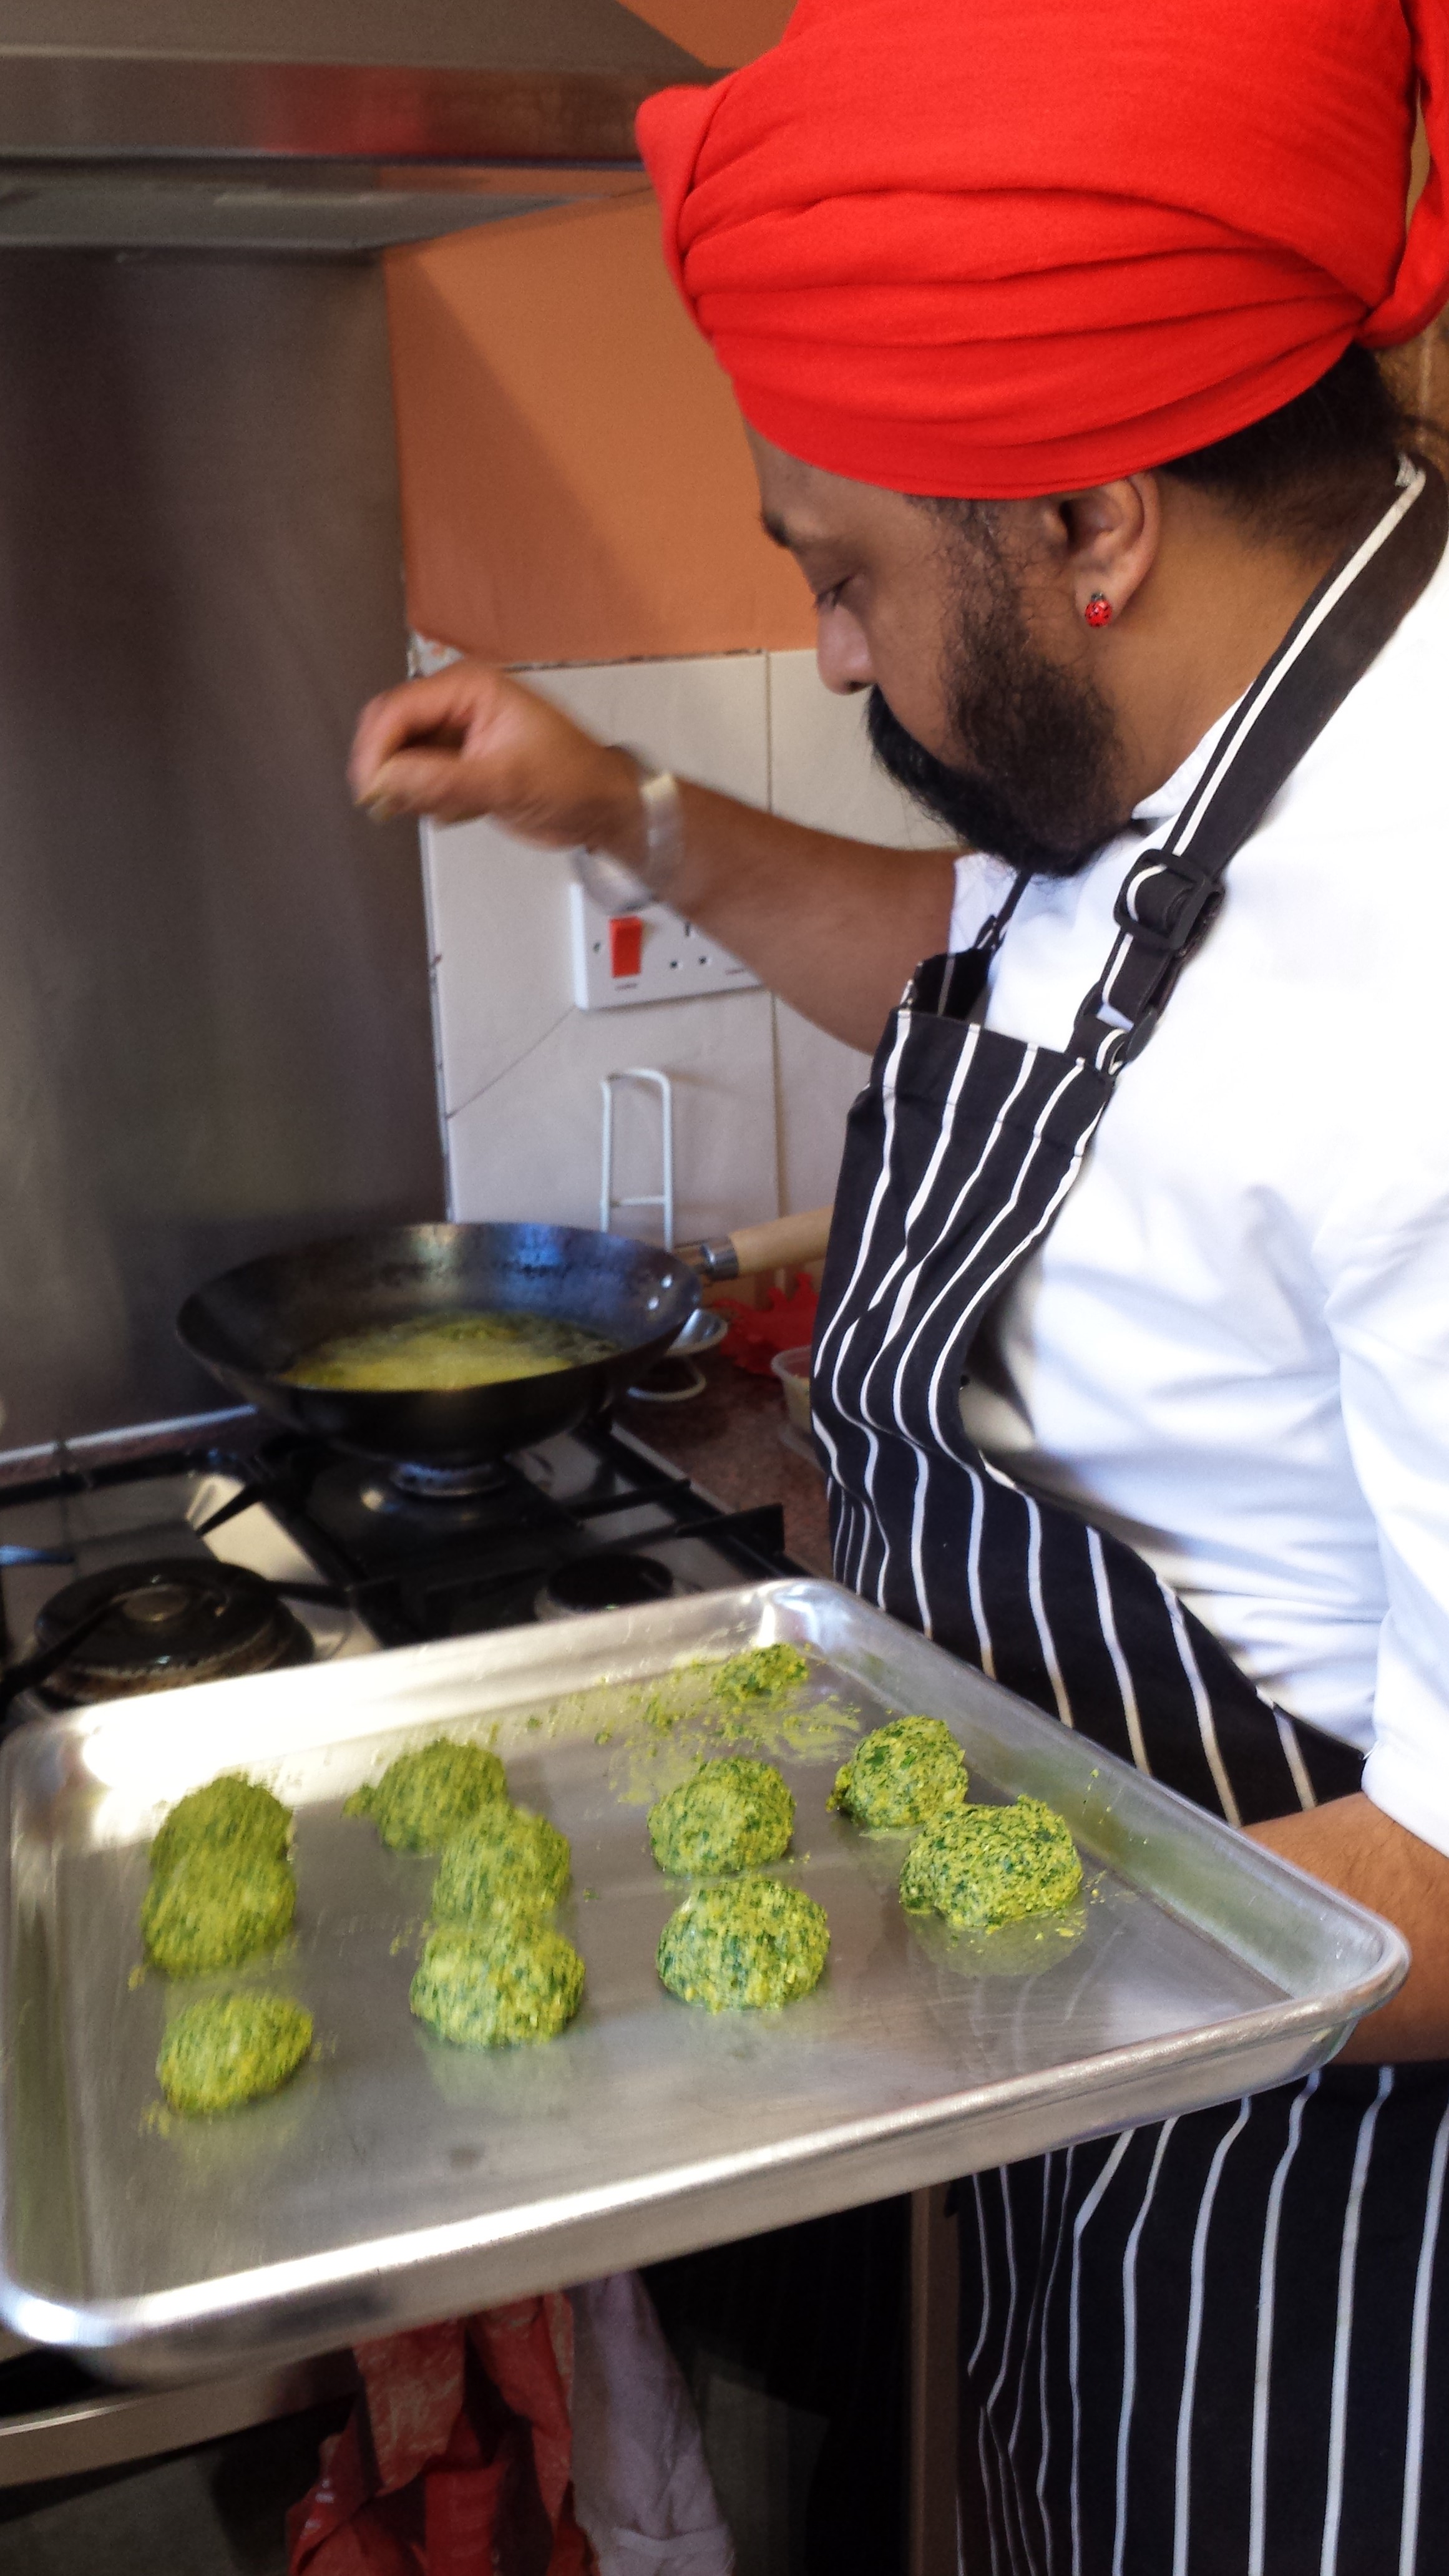
At this point we were already 2 hours into the session and some of the food still had to be cooked. The kiddo and hubby were due and there was nothing for them to eat. There was only an hour left and so we made an executive decision that he would spend the remaining time cooking falafels and showing me how to make prathas. And whilst he wasn’t watching the clock, he did have a plane to catch to London later and I didn’t want to keep him too long. As we had cut up the ingredients, I was confident I could make the samosas and herbed rice myself later.

Falafels:

I had soaked the chickpeas the day before – he drained these and then whizzed them in the processor. Then in went some of the prepped garlic, parsley leaves, tarragon leaves, coriander leaves, baking soda, salt, pepper, cumin powder, ground coriander, ground cardamom and the juice and zest of a lemon. The herbs made the mixture beautifully green and fragrant.  Usually the recipe has chillies but I wanted to make them less spicy so I think he just put in a bit of chilli powder. OK as I was chopping bits of myself off, and talking, I didn’t see exactly what he was sticking into the food processor but I’ve got the recipe so should be able to replicate it all. The mixture was runny so we added gram (chickpea) flour to thicken it slightly. Unfortunately, once whizzed it was apparent the chickpeas hadn’t soaked enough as they were still grainy. This was really disheartening as they had been soaking for over 12 hours. Next time, I will do it for longer.

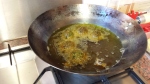
Just in time, hubby and kiddo came home and to my amazement, she wanted to help so he set her to getting the falafel balls ready for frying. I got another tip here which is to make sure that when putting the falafels in, I should not just drop them in but kind of glide them in so I don’t burn. We used rapeseed oil – another new ingredient which I have never used. On the rare occasions I fry food, I use either groundnut or sunflower oil. The latter usually leaves a strong frying smell in the house which is one of the reasons I don’t like frying food (and yes, the other is health, I would much rather use the oven). However, the rapeseed oil didn’t leave that strong smell around the house. So I may use that going forward though it is relatively more expensive (I got two bottles rather cheaply from Costco for this session)

BTW, Check out the white stripe in my hair …bride of Frankenstein!
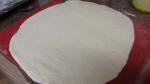
20150320_130151 20150320_130328 20150320_13070720150320_131911

Prathas:

I love parathas (the way we pronouce it in our house). My mum used to make wonder stuffed ones -sometimes with spicy potato mixtures, other times with a very sweetened dhal. She also used to make simple ones fried in ghee (clarified butter) but I didn’t pay attention and never learnt off her. So fast forward 35 years and a Punjabi Scot showed a London raised Guju woman and her little kiddo how to make them. The little one was very cute as we got out her mini rolling board and pin. And he was very good about teaching us both – he’s a brilliant teacher and very patient. I can see why he is asked to go into schools to teach kids and he is very easy going but inspiring.

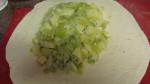
The first set were stuffed with the potato mixture which contained crushed boiled potatoes (not mashed, had some lumps in for texture), red onion, coriander powder, cumin powder, chili powder, salt and chopped up coriander and a bit of tarragon again. The recipe includes chopped chillies but as I wanted kiddo to eat them, we left those out. However, in the future, I will divide the mix and add chillies to the ones for hubby and me.

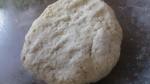
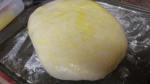
Another tip – prep dough to use for 3 days. I was aghast at this as I always make my dough fresh but he said that it’s fine to prep before and keep the dough in the fridge. Another time saver tip.

20150320_134022 20150320_133745   20150320_133410 20150320_133309 20150320_13323820150320_133644

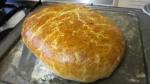
And even though he was short of time, he showed us how to make a sweet paratha using jaggery and ghee which are laid onto one end of the rolled out circle, the the circle is rolled up. The roll is then made into a spiral and rolled out flat. He said that we could make layers and layers but healthy mamma said no, thats fine. In the pan, I dry cooked a side until brown spots appeared and then flipped over and brushed on ghee (oil on the potato stuffed ones). Once one side is cooked, repeat on the other. Both versions were just lovely and the little one enjoyed making them. In truth, I still need more practice before I get them perfect but at least I have a better idea of what to do now.

Mushrooms: Here’s our Tony cooking down the mushrooms. I had a mix of mini portabella mushrooms (wiped and sliced, stalks and all), shitake (wiped, stalks discarded as they are quite rubbery and chopped) and oyster (no wiping needed, all chopped). He cooked off onions in a bit of oil in the pan, then in went the mushrooms and herbs. Tarragon – wowser wonderful. The mushrooms were meant to be for the samosas but over the next few days hubby had them with sausages, I had them on toast and then also stirred through pasta. I am totally converted to tarragon – an aniseed type flavour that just tastes delicious.

20150320_132734 

Through out all the cooking, he had me taste the mixes to make sure seasoning was right. I have to admit this is not something I always do, especially when I’m in a hurry and I know that I should.  I don’t think I always got it right as in retrospect, both the parathas and mushrooms needed more salt.

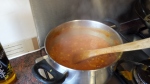
That evening, I made more parathas, falafels and also the herbed rice which even the kiddo ate together with the amazing dhal. I probably wouldn’t haven’t the herbed rice with all my dishes, but I can see it being a great base for the falafels, or for a lunch or just as a quick snack. I didn’t make the samosas as we had so much food to eat that we would have ended wasting them. I did however, mix up a small amount of satan’s ketchup to have with the falafels the following night for dinner – and let me tell you, it’s another keeper. Wonderful blend of tomatoes and spice that complemented the falafels well.

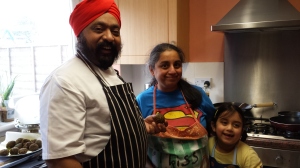
And here’s us at the end. Smiles all round.  I look demented – I don’t photograph at all well which is why I rarely show myself on this site and to make it worse, I was KNACKERED – it was a lot of work but man, what a superb morning.

20150320_135339

And the bonus, at some point once the kitchen is back he’ll be back to get a master class off me on how to make pickles. And I cannot wait as I’m sure by then I will be a master chopper and a much better kitchen helper.

P.S. it’s true the man is very messy. I took the rest of the day to clean up the mess!!!!!! Next time, I’m gonna make sure he knows where the mop is. 😉

Leek and potato pie with suet pastry

IMG_1951

Everyday I go to work through Edinburgh Waverly station I pass by the Cornish Pasty shop. I love their vegetable pasty. It’s the same one I used to get in Maidenhead when I worked there, and at London Bridge on the way to see the then boyfriend-now-Mr-Plummy-Mummy.

So I wanted to have a go and ended up mashing (probably in inappropriate term in this context….synergizing?) two recipes – the pastry from Louise Pickfords Mediterranean Suet Parcels from her Vegetarian Cookbook and the filling from a good food recipe.

Ingredients

For the pastry

  • 500g Self raising flour
  • 1 teaspoon salt
  • 175g shredded vegetable suet
  • 150ml yoghurt
  • 200ml milk

For the filling

  • 2 leeks (500g)
  • 2 potatoes (500g) – used Greenvales potatoes. They are just gorgeous for everything.
  • Knob of butter (about 10g)
  • Pinch of dried thyme or rosemary
  • 1 inch ginger grated
  • 150g cathedral city mature cheddar
  • Salt and pepper
  • I small egg for the glaze

Method

For the pastry

  • Sift the flour and salt into a large bowl
  • Stir in the suet (I found the consistency a bit odd as the bits were like little pellets)
  • Mix the milk and yoghurt together and then slowly pour into flour a little at a time. Form in to a dough and kneed lightly until smooth. I had a little trouble at this stage due the consistency of the suet. I wasn’t sure how much to knead it as short pastry shouldn’t be worked too much.
  • I kneaded until it was somewhat smooth then covered the bowl with cling film to rest whilst I made the filling

For the filling

  • Turn the oven on to 200 degrees (400f, gas mark 6)
  • Wash the ginger, potatoes and leeks thoroughly
  • Chop the leeks into small pieces – I did this by quartering the leeks along their length then slicing these finely. A serrated edge knife makes this a doddle. For good measure, I always rinse leeks again to get out dirt that is caught between layers
  • Peel the potatoes then slice in thick slices.
  • Peel the ginger then grate it finely
  • Heat the butter in a large frying pan then add the sliced leeks, herbs and ginger and cook over a low heat until very soft
  • Meanwhile, place the potatoe in a pan with cold water and bring to the boil. Then simmer for a few minutes until the potatotes are slightly softened (i.e. parboil them). I wish I had cooked mine a little longer as they stayed quite firm in the pie.
  • Once the leeks are cooked, drain off the potatoes and stir in. Let the mixture cool
  • Cut the cheese into small 1cm cubes and stir into the mixture
  • Season with salt and pepper

The construction and cooking

  • Get a baking sheet ready. Dust it with a bit of flour.
  • Roll out the pastry until it forms a 14inc wide square. That’s what the recipe says. What it doesn’t mention is how hard that dough is to roll. My arms were aching. But after a bit of stubbornness, I got a sort of square (ok it was a rectangle but hey ho)
  • Place the cooled mixture in the middle.
  • Then, I was meant to water the edges of the pastry and bring up the corners up to form a parcel. Things did not go to plan!  I think I had too much filling and the edges would not stick together. I should have rolled the pastry out a little larger or just done what the good food recipe said and made two circles. Anyhoooo, I got very frustrated so kind of rolled it into a cylinder shape, picked it up and plonked it onto a floured baking tray. The pie had a bit of leakage – in future, I will add one teaspoon of flour to the mixture to thicken it up
  • Glaze it with egg wash (I used a silicon brush, think you could also glaze with milk if you prefer to keep the thing egg free)
  • Put into the oven and cook for 30 minutes until lovely and golden
  • Take out and let it cool for 10 minutes. Marvel in the glory of a home baked pie. Slice it up and marvel again as the wonderful feeling oozes out a bit
  • Serve with greens, salad or as we did GRAVY

IMG_1952IMG_1940IMG_1941IMG_1943IMG_1944IMG_1945IMG_1946IMG_1947IMG_1948IMG_1949IMG_1950


The review

Not bad for my first pie. But I think in future I will use shortcrust as I prefer the crust. I’m going to try to make a pie with traditional samosa filling made out of carrots, peas and potatoes…bound to be healthier than the fried version right?

BTW check out my new bin from the council – it collects food waste. How wonderful!

IMG_1942

Courgette, ricotta and onion stuff

IMG_1933IMG_1934IMG_1932IMG_1938IMG_1939IMG_1937IMG_1935


Ok I don’t really like Nigel Slater but he happened to be on the other day and made this deconstructed pesto thingy with courgette. As I wasn’t paying attention, I had to turn to Google for recipe help and came across this lovely Courgette and Ricotta pasta recipe. Luckily for me I had some of the ingredients in the house…by which I mean I had bought both courgette and ricotta and then completely forgot why!

I had mine with some couscous rather than pasta. I was delicious – even Mr-Plummy-Mummy-I-don’t-eat-courgettes agreed so we will be making this again I’m sure and I’ll try to remember the parmesan and lemon zest.

I’ve paraphrased the method below but all credit goes for this yummy dish to the Good Food food writer.

Ingredients

  • Olive oil (I used extra virgin, but plain OO would be fine I’m sure
  • 1 large courgette – sliced with a veg peeler. I discard most of the skin as kiddo wouldn’t eat it
  • 1 escallion – very finely sliced lengthwise.
  • 3 cloves garlic – very finely sliced
  • half a tub ricotta –
  • about 10 leaves of basil (was a bit strong, will use less next time)]
  • Salt and pepper to season

Method:

  • In a dry large frying pan, dry roast the pinenuts. Once browned, take out and leave to cool on a plate
  • Return pan to heat, add oil and fry the escallions and courgettes in the oil over a medium heat until softened
  • add garlic and cook for 2 mins more
  • turn off heat and fold in the basil and pinenuts.
  • Dot in the ricotta – I only used half the tub as felt a full tub would have been too much with couscous. Do it by eye I say

Serve with couscous with roasted red peppers and spring onions


Stovies

There are so many ways of making stovies that I wouldn’t dare give a definitive recipe. Each region, nay each household has their way of doing it. From what I can gather, stovies started out as  a peasant’s meal using whatever bits of meat that could be found and eked out with a lot of root veg.

In the last few weeks I’ve been busy teaching a healthy eating cookery course. As some of the recipes are meat based, I’ve been getting Mr Plummy Mummy to try them out as I “teach” him how to cook them. And I’m trying out vegetarian versions by replacing meat with quorn.

Here is the amended ingredients list:

Serves 2
Ingredients

  • 200g frozen lamb mince for meat version / 200g quorn mince for the veggie one
  • 1 vegetable stock cube, made up with 1 pint of water
  • 2 large potatoes, peeled and thinly sliced
  • 1 parsnip, peeled and thinly sliced
  • 1 carrot, peeled and thinly sliced
  • ¼ small turnip, peeled and thinly sliced (that’s a swede to the English, a turnip to the Cornish and I think a rutabaga in America)
  • 1 large onion, peeled and thinly sliced
  • pepper to taste


So here is are some pictures of  our efforts.

The meat was browned off without any oil. Then the veggies were put on top, the gravy added and the lid popped back on the pot. For my quorn version, there was no browning needed so I just added quorn to the pan, layered on the veggies and then added some vegetable stock. I had some minced garlic left over from another meal so I chucked that on top too. It didn’t take long to cook. I must admit that I had to have gravy with mine for a bit more flavour. I was very surprised that that I really enjoyed this dish as it’s a lot less spiced than my usual fare, but for a cold Spring day, it hit the right spot. It’s a pretty cheap meal too which is a huge bonus in my books.

CPC Stovies IMG_0374 IMG_0375

Spanish stuffed peppers (review)

IMG_0345

Another quick post. Asda sell some great little cookbooks that aren’t very expensive. I have one called Tapas 100 everyday recipes which a Spanish mate who used to work in a tapas bar told me about.

This week, we tried the stuffed peppers which were very good with a side of  garlic mushrooms, oven roasted potatoes and grilled tomatoes. The only change I would make for the future would be to use smaller peppers (the ones we had were HUGE) and roast for a little longer so they begin to lose that crunch and take on roasted in sweetness.

Ingredients

  • 90ml olive oil plus little extra for rubbing on peppers
  • 2 onions finely chopped
  • 2 garlic cloves, crushed
  • 140g Spanish short grain rice (I just normal rice)
  • 55g raisins
  • 55g pine kernels
  • 40g chopped parsley
  • 1 tbsp tomato puree dissolved in 750ml water
  • 6 red, yellow or green peppers (or a mix)
  • Salt and pepper

Cooking:

  • Pre-heat oven to 200 degrees / gas mark 6
  • Heat oil in a shallow, heavy based flame proofed casserole dish. Add the onions and cook for 3 minutes. Add the garlic and cook for a further 2 minutes until onion is soft but not brown.
  • Stir in rice, raisins and pine kernels until all are coated in the oil , then add half the parsley and salt and pepper to taste. Stir in the tomato puree mixture and bring to the boil. Reduce the heat and simmer, uncovered, shaking the casserole dish frequently, for 20 minutes, or until the rice is tender, the liquid is absorbed and small holes appear on the surface. Watch carefully because raisins can catch and burn. Stir in the remaining parsley, then cool slightly.
  • While the rice is simmering, cut the top off each pepper and reserve. Remove the core and seeds from each pepper.
  • Divide the stuffing equally between the peppers. Use wooden cocktail sticks to secure the tops back into place. Lightly rub each pepper with olive oil and arrange in a single layer in an ovenproof dish. Bake in the pre-heated oven for 30 minutes, or until peppers are tender. Serve the peppers hot or cool to room temperature.

Shakshuka with home made rye bread

I’ve been a lazy old thing about updating my blogs. It takes quite a bit of time for me to write posts and lately, I’ve been busy with a new bread making course, a “Get Cooking” course run by West Lothian Council and with my kiddo going off to primary school. I have been cooking but just not updating here. But this recipe was just so very delicious that I have to write it up.

I got the Shakshuka recipe from the excellent A Wee Bit of Cooking blog which is about Scottish food. It is a Mid-Eastern dish. And it’s gorgeous. I made mine with cumin seeds and used the cherry tomatoes. Initially we thought it would not be enough but with the home made caraway rye bread I had learnt to do in last weeks baking lesson, it was very filling. We could have easily eaten more though as it was delicious..have I mentioned that? Needless to say, I’ll be making it again very soon. Who knows, I might even persuade kiddo to have some.

Ratatouille with lemon and coriander cous cous

I’m was never keen on ratatouille… it’s a bit too much like nut roast in being very “vegetarian”. In the olden days before being veggie was acceptable, ratatouille was often the only offering on a restaurant menu, and it was awful.

However, times have changed (or is it me? or was it the film Ratatouille????). I went for a Delia recipe of oven roasted ratatouille. I started off cooking it on the hob, the moved my casserole pot to the oven to roast it off. I also missed off the coriander seeds because I forgot them but the results were great so I don’t mind. The first time, I cooked it with basil however, tonight I used crushed chili seeds instead. Both were equally yum.

On both occasions, I ate it with cous cous with a healthy squeeze of lemon and 1 tbs of finely chopped coriander stalks. It’s so delicious and a bonus for me is that it can be frozen as for some very mad reason Mr Plummy Mummy will not eat cooked aubergine or courgettes….more fool he.

As it’s a Delia recipe, I can’t copy it here. However,as the pictures I took were just so colourful, I cannot help but post them up.


Mushroom quiche

Nothing more vegie than quiche except perhaps nut loaf which I’ve never had, never going to, end of.  I love quiche in summer eaten cold with a salad, or straight out of the oven in autumn/winter with lots of oven roasted potato wedges or salad. Today I am rather pleased with myself as I made my little one two mini quiches, and a large seasoned one for hubby and myself. She felt very special having her own but funny little girl that she is, she ate the filling and left the crust.

I cheated. There I said it. My guilty secret is out – I used shop bought pastry but it was an all butter version and supposedly easier than making it myself. But what c**p – I had to let it defrost in the fridge for 24 hours, then leave it out for an hour before cooking. I could have just made my own pastry but I was busy, busy, busy (read that as lazy, lazy, lazy). This recipe is based on the mega delicious Louise Pickford’s Chickpea and Spinach Flan found in Vegetarian Cooking. Again, I normally blind bake the pastry to make it crispy but today I thought Nooooo, I shall Delia it and bung it in the oven, pricked over, brushed over with egg wash. It was fun, every now and again when the pastry rose, I opened the oven and pricked it to let more air out. It was fine. It worked.

Ingredients:

  • 500g shortcrust pastry
  • 1 tbs olive oil
  • 1 small onion diced finely
  • 1 clove garlic
  • 1/2 tsp turmeric
  • 150g organic chestnut mushrooms
  • 4 free range or organic medium eggs
  • 75g mature cheddar
  • 1/2 pint full fat milk
  • Butter to line pastry dishes
Cooking:
  • Preheat the oven to 180 degrees (fan oven)
  • Grease the fluted pie dishes with butter and set aside
  • Roll out the pastry and put into the flan dish (or dishes if your being a clever clogs like me)
  • Cut off excess. And then gently push the pastry into the grooves. It’s going to shrink so let a little over the edge.
  • Cover with egg wash ( break an egg, mix it up, take a pastry brush and brush a thin layer over the pastry)
  • Bung in the oven and cook until it is crispy and golden. If it dares to start rising, just prick a few times more. Most therapeutic.
  • Whilst the pastry cooks, prepare the filling.
  • Heat oil in a pan and add onions, garlic and turmeric. Fry for about 5 minutes til the onions start to brown. Add the chopped mushrooms and cook for about 3 minutes until some of the moisture from the mushrooms starts to ooze out.
  • While onions/mushrooms cook, mix the eggs and milk together. Season wth salt and pepper to taste.
  • Now the fun part. Spread onion mushroom mixture on the golden pastry cases. Then layer with cheese (leave a tablespoon or two for later). Final step, pour on the milk mixture. I had a tiny bit left over, guess it depends on the size of the dish(es).
  • Bake until the quiche is firm. As a final flourish, add a little bit of cheese on to create a thin crust.
  • Serve with chips, salad, potato salad or / and coleslaw.

Tomatoes, fried rice, noodle soup and banana bread

Not all in the same dish but all scoffed today. I’ve been stuck at home waiting for a delivery. Apart for moaning rather loudly, I used the time to do home food. We picked two very red tomatoes off my daughter’s tomato plant. She was given the plant as a tiny thing from Greenslade nursery and over summer we have watched it grow. It survived the move to Scotland and has in fact flourished with many new tomatoes appearing on the plant even though I’ve not been feeding it. The tomatoes at the bottom appeared rather early but took forever to turn red – mainly as I had them indoors and didn’t know they need to be out in the fresh air and sun to redden.

Anyway, here we are – a tomato salad according to my daughter consists of errr, ummmm, tomatoes!

She nibbled one before reminding us that she in fact, did not eat tomatoes (unbeknownst to her she does as mummy hides tomatoes in sauces). So hubby and I ate the “salad” with a sprinkling of sea salt. Not the tastiest tomatoes we have ever had but easily the best if you know what I mean.

Next step was egg fried mushroom rice and tofu for daughter’s dinner – so yum that I had to have a small bowl too. A good way to use day old rice. Easily made by frying spring onion and ginger in a large frying pan, adding mushrooms and cooking until they reduce, add the rice and stir carefully to prevent it all sticking together but to make sure all the rice is covered with the mushroom mixture . Push mixture to the side and add in the beaten egg mixed with a little toasted sesame oil, scramble it then combine with rice mixture and cook for a few minutes more. I added a little dash of dark soy to improve the taste and colour. She scoffed a lot with a side dish of fried tofu.

Dinner for hubby and I was a noodle soup. It’s an impromptu dish I’ve made a couple of times with what was available in the fridge. Today we had spring onions and ginger fried, added a thinly sliced orange pepper, some pak choy, sweetcorn (kernels not baby sweetcorn as i find that tasteless) and mange tout. The soup was made with a big glug of Gourmet Garden Thai Fresh Blends mix and about a cup of water. I cooked this for about 5 minutes on medium heat then added in fried tofu, and some thick straight to wok udon noodles and dark soy sauce. Cooked until the pak choy had wilted. At first I didn’t really like the Gourmet Garden taste – it was too bland especially compared to the  Schwartz Lemon Grass, Ginger and Coconut tube I’ve used before. However, as it cooled, and with a dash of light soy sauce, it improved.

We would have had a lot more tofu for the soup but my little one loves the stuff straight out of the packet and just as much fried. She thought it was hilarious to sneak past me all afternoon nicking bits and stuffing them in her mouth.

The Gourmet Garden sent me hurtling back to my youth – while I was trying to google whether it is vegetarian, a restaurant came up called the Gourmet Garden in Hendon. I grew up in a flat that was directly opposite the restaurant and could see it and a lot more of the high street from my window. Silly things like this always bring a soppy tear to the eye.

This is turning out to be a long post and it’s not over yet. I’ve been promising to make banana bread for a few days. A lot of stay at home mums I know make banana bread and as long as you don’t have it every week, it’s bloody tasty. I’ve already scoffed a fifth of it – so a huge thankyou to my friend J.R. as she sent me her version of a Delia recipe. It’s fantastic. I’m going to have to work extra hard in the Zumba class tomorrow night!!

Plum and rhubarb crumble

In the past I have made Louise Pickford’s Rhubarb, Apple and Double Ginger crumble (in the Hamlyn’s Vegetarian Cooking book) with mixed results. I think the problem is that I use a smaller pie dish than the recipe calls for so it always feels like I have too much crumble topping. I also find the amount of ginger a bit heavy. So today I amended the recipe, making less crumble and adding some plums to the mix. Again the results were mixed. It was still very ginger-y and the plums got lost in the flavours of that and the tart rhubarb. But with a bit of custard, it was very tasty indeed and perfect for the kind of autumnal day we had today in Central Scotland.

Ingredients:

Filling

  • 400g rhubarb trimmed and cut into 2inch pieces
  • 1tbs chopped preserved stem ginger (was very strong, next time will use 1/2 tbs)
  • 40g golden caster sugar
  • 6tbs water
  • 300g plums – stone and sliced

Crumble

  • 100g plain flour
  • 40g ginger biscuits – crushed
  • 20g Scottish porridge oat
  • 50g butter
  • 3 tablespoons Demerara sugar

To make the filling

  • Discard rhubarb leaves, wash the stems and cut them into 2inch pieces and place in a large pan
  • Chop the stem ginger into tiny pieces (believe me you need them small as getting a chunk of ginger is not pleasant). Add to the pan
  • Wash then stone the plums. Chop up the flesh (with skin on….oooh that sounds so gruesome!) and put into the pan with the rhubarb, ginger, sugar and water
  • Simmer for 10 minutes
  • Once cooked placed in a greased oven-proof dish.

Making the crumble

  • Put flour in a medium-sized bowl, and stir in the crushed ginger biscuits and oats.
  • Rub in the butter until the mixture looks like breadcrumbs
  • Stir in sugar and combine well

Putting it all together

  • Pre-heat oven to 190 degrees
  • Spread half of the crumble mixture onto the stewed fruits and cook in the oven for 10 minutes
  • Spread rest of crumble mixture onto the crumble/fruit and cook until the mixture is bubble and the topping is golden. About 40 minutes

Serve warm with custard, vanilla ice-cream or a spoonful of single cream