Toasting and grinding spices

Two ingredient posts in one day!!!!

Whenever I watch Indian chefs on tv, they always bang on about toasting and grinding their own spices. I don’t remember my mum ever doing it and so I don’t do it either. In my cooking I use a combination of whole spices and ready ground ones.

Whole: cumin seeds, mustard seeds, carraway seeds, cardamom, cinnamon bark, cloves, dried peppercorns etc.

Ready ground: cumin powder, coriander powder, chilli powder, turmeric, salt, asafoetida, paprika etc.

I like to have the whole spices in the dish when I eat (though I don’t actually bite on them as they are really strong!). It adds a dimension to my dishes that I enjoy. I have tried to toast my whole spices before grinding them in my coffee mill. The benefit being not having to pick out the whole spices when eating. But I found the ground spices all melding together and lost something. I think it’s a matter of individual preference. 

But then I was watching Saturday kitchen – a segment with the gorgeous Spice Men and my man, Tony Singh. He showed me the way! He lightly toasted some spices, not too hot as he was able to continue handling them (though bear in mind, chefs have asbestos hands), in this way the spices release their flavour. And then after they had cooled he gently pounded them in a pestle and mortar.

So if gave it a go and wowsers, what a difference. I added these to a mung dal that night and it was delicious. So there you go, I’ll toast and pound from now on.

IMG_1769

Fenugreek and aubergine shak (methi, ringan nu shak)

CPC fenugreek aubergine shak with rotlis

As mentioned in my last post, I grabbed a couple of bunches of fenugreek from Amma Spices this weekend. I should have prepped them on the same day as they tend to quickly wilt so please excuse the rather sad looking pictures below. If you want to see more chef-fy type pictures go here.  Luckily, I was able to rescue quite a few of the leaves. I’ve saved one bunch’s worth for theplas which are a Gujarati spicy bread that I LOVE. The leaves of the other bunch went into another childhood fave of mine – the recipe I’m sharing tonight.

Fenugreek is used extensively in Indian cooking. The seeds which are hard little yellow stone looking things will be combined with mustard seeds at the start of many vagars (base sauces). I use it sparingly as the seeds are so strong but if I miss them out, the dish is definitely lacking. And as stated above, the leaf is used in theplas and curries both vegetarian and non. In Gujarati, it’s called “METHI”. These days it’s possible to buy frozen methi but in truth, I prefer fresh. It’s like the difference between frozen and fresh spinach – the former is convenient but the taste of the latter is infinitely superior.

The quantities in the recipe below make enough for one. I like to delicately spice this as I want the focus on the vegetables. If cooking for more people, double the quantities. Alternatively serve it as a side dish.

The taste can be bitter but I enjoy that bitter undertone that can come with some vegetables.

It’s meant to be really good for women who are breastfeeding but if you are preggers, best to keep away as it apparently induces labour.

Ingredients:

  • 1 tbs ground nut oil
  • 1 tsp black mustard seeds
  • 1 green chili chopped finely
  • 2 -3 cloves garlic minced very finely
  • Leaves of bunch of fenugreek (see prep below)
  • 1 medium dutch aubergine or 2 – 3 small round indian aubergines (brinjal). Washed, then cut into very 2 cm small cubes
  • 1/2 tsp salt
  • 1/2 tsp chili powder
  • 1/2 tsp turmeric powder
  • 1/2 tsp coriander, cumin powder

Prepping

When buying fenugreek, look for bunches with bright green leaves. Then prep them asap. Don’t leave them like I did to get yellow!


  • The stems of fenugreek can be quite thick so I don’t use it in my cooking. I am not sure it’s got much taste say compared to coriander.
  • For this reason, I pick off the green leaves and discard any yellow or mangy looking ones. If the stem attached to some leaves is thin/fine then I won’t pick that off.
  • Luckily, it’s very easy to pick the leaves off just using your fingers and thumb.
  • Rinse the leaves thoroughly until all the mud is removed. Else you are going to have really gritty food. The amount shown in the 3rd picture about is what I harvested from 2 bunches but for the recipe above, I only used half the amount. I put the other half into a freezer bag to use later.

Cooking:

CPC fenugreek aubergine shak

  • In a medium sized sauce pan, heat oil over medium flame
  • Once oil has heated up, add the mustard seeds (tip: add one seed to see if oil is ready, it should start to fry/splutter. Mustard seeds sitting in oil can end up really horribly bitter)
  • As the seeds splutter, add the chili and garlic. Cook for a few seconds, then add aubergine, fenugreek and spices.
  • Stir everything over a medium heat until the vegetables are well coated with spices
  • Turn flame down to low, cover the saucepan and cook until the aubergines soften and the fenugreek wilts. You may need to stir occasionally to stop the food from sticking to the pan.
  • Serve with hot, ghee smeared rotlis.

Tip:

If you cannot get fresh fenugreek, look for the frozen stuff in your local Indian grocery. Alternatively, you could try to grow your own…I’m going to have a go following the tips in this post Growing Methi once I figure out the right time of year to plant them. Or does that matter if I’m growing them indoors????

Curry leaves

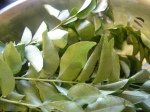
Just a quick post about one of my favourite ingredients – curry leaves (limda in Gujarati). A wonderful aromatic herb which add a distinctive flavour to dhals and when fried to bombay mix type concotions. I’m hoping to grow some and have tracked down two nurseries that supply plants in the UK: Old hall plants and Poyntzfield herb nursery.

Now before we go on, let’s get one thing clear – I am not talking about the curry plants that are sold in some garden centres which have a very strong curry like smell Heichrysum italicum. I bought a bunch of these to keep the cats out of my garden. The plants that grew very well only succeeded in being cat barriers when they had grown so big the cats couldn’t get in. As far as I know, the leaves aren’t edible.

I am talking about Murraya koenigii. If you go to an asian supermarket, they are easy to find. They will be in the fresh herb section next to the coriander (another fave). The leaves should be glossy green and attached to their branches. You can pick each one off individually, or be lazy like me and just run your fingers down the stalk and just pull them all off in one go. Wash them well in cold water. Chuck out any bruised/black ones and freeze the rest. They last for ages (which is my way of saying, I don’t know how long you can freeze them but it’s ages)


Bark as good as my bite

Often in my recipes I include cinnamon. I use the alternative which is known as cassia bark or chinese cinnamon for most of my cooking as it’s more robust in a sauce or when being boiled as part of a pilau. The usual amount is a 2inch piece of the bark. It is  cheaper, stronger tasting and less sweet than cinnamon – IMHO the latter is better suited to sweet dishes or for hot chocolate/mulled wine drinks.

There are some health concerns with cassia having large amounts of coumarin which can affect the coagulation of blood so if you are worried, use true cinnamon instead. For this reason, I only use Schwartz’ powdered cinnamon for my daughter’s food.

How to tell the difference: Cassia is bark like – dark, very thick and when in a tube, it is hollow


Cinnamon – a very pretty reddish brown. True cinnamon is shaped as quills and will cost a lot lot more than cassia.


Too hot to handle

Woooohooooo I am back to cooking on gas. I cannot tell you how much of a relief it is to have left our last house with it’s annoying induction hob and move to a place with a 5 ring gas hob. So now I’m back to proper cooking I  have an issue to overcome – all the spicy food I cook lately is too spicy. This might sound odd but I have never enjoyed food that is all heat – I like to taste the vegetable that I am eating and also some of the other ingredients in the dish. If a dish is too spicy all you get is pain (both on the way in and on the way out).

I have tried changing from the  4 rated finger chili to the 2 rated green chili (aka as an Indian Hot Pepper) from Tescos. In truth I prefer using bullet chilies from an Asian grocers but there aren’t any around here.  I just had a quick look on a chilli site which mentions a Jinta chilli that looks similar to ones I’ve used before so maybe I will order some.

In addition, I’ve just chucked all my Natco chili powder. The package is marked Very Hot which made me wonder if that was the cause of the heat in my food. Unfortunately, the TRS chili powder I found in a local supermarket is Extra Hot – what a shame they don’t sell the normal TRS chili powder. I’ve bought it for now though as I have to have chilli powder in my kitchen.

So I’m turning into a  Heston B here and experimenting with different amounts of fresh chilli and the chilli powder as there seems to be a point where too little is just so bland but a few grains more and I’m back to burning my head off. I would love to buy all the different versions of chillies and chilli powders (see the site Spices of India …there are loads and loads). And in the meantime, I’m going to start growing some at home using this pack that I was give for Christmas 🙂

Burnt on food

The first part of this tip is:

Do not leave food cooking while you jump on the computer to quickly check something on the internet. There is never anything quick about the internet and before you know it, food has burnt to a crisp and ruined your favourite stainless steel pressure cooker.

The second part of this tip is:

Follow manufacturers instructions for cleaning your pot. But if you are brave, ditch the Mr Muscle type products and reach for a can of diet soda, irn bru or in my case Fanta. Pour in enough to cover the burnt on food, then bring to boil. Leave overnight and magically the next day, the burnt on food should be easy to take off with a scourer.

I take no responsibility for your pots being ruined if you follow this tip. For myself, I have a nice shiny pressure cooker again so I’m happy.

Tips: Ginger

Here are some tips on how to buy and store ginger. Fresh ginger lasts for a couple of weeks in the fridge but I find that it tends to dry out quite quickly so I prefer to freeze it.

Look for ginger that is not dried out – the best way to check is to snap a piece off. It should break cleanly and the centre should not be too fibrous. Fresh ginger is very wet too when snapped.

I store ginger in the freezer. To do this, peel the skin off. I know that some TV chefs say you don’t need to peel it, and that’s up to you but personally I prefer peeled. The skin comes off quite easily either by scraping it with a knife or even a spoon. I think grate it up to the fibrous core which I discard.

For convenience, I put the ginger into ice-cube trays. Once frozen, I take the cubes of ginger out and store in a freezer bag. I confess I’ve used frozen ginger months after storing it. I have an ice cube tray where each cube is the equivalent of a teaspoon of grated ginger.

When I need it in a recipe, I just take a cube out and pop it into the dish – it thaws when cooking very quickly.